
 Bookmark
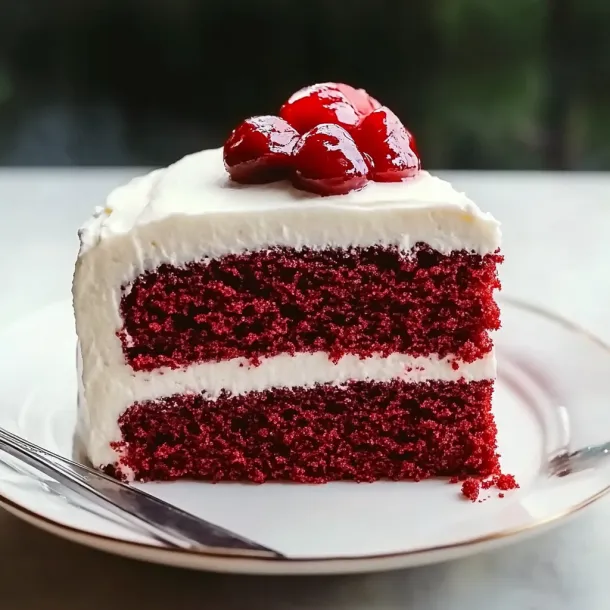
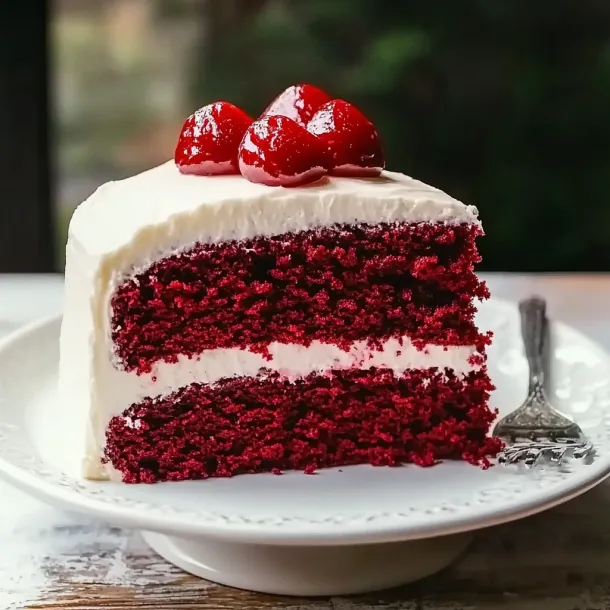
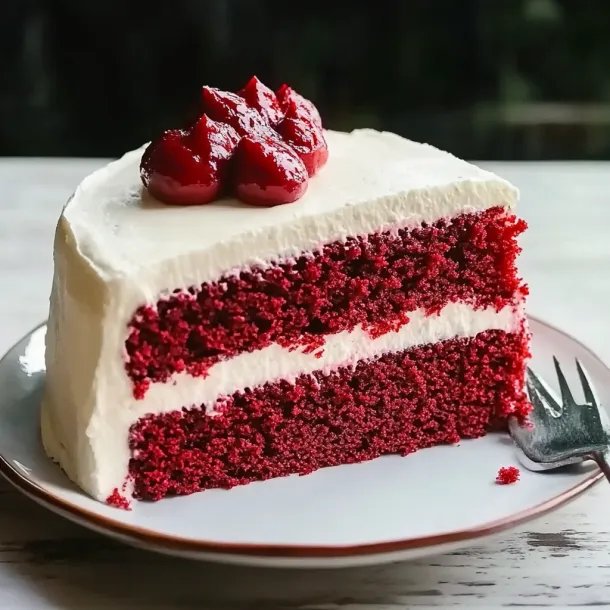
This beloved red velvet treat from my grandma always steals the spotlight at family parties. Its bold red color and tangy cream cheese frosting spark sweet memories of growing up. Every slice is pure joy and feels like a big celebration.
Sundays meant baking with grandma and those times still linger in my kitchen whenever I make this now. The scent brings back those cozy afternoons every single time.
Luscious Ingredients
- Powdered sugar: thickens and sweetens the frosting make sure to sift so it’s smooth as silk
- Cream cheese: gives the frosting its signature tang and creamy goodness always pick the block type for the best consistency
- White vinegar: boosts the rise and adds a zippy flavor distilled is the way to go
- Vanilla extract: layers in warmth and depth go for the good stuff—pure vanilla whenever you can
- Red food coloring: creates that bold iconic color gel coloring packs the biggest punch
- Buttermilk: makes the cake moist and a little tart shake before you pour it in
- Eggs: hold everything together and make the cake rich use several large ones and bring to room temp first
- Granulated sugar: makes it sweet and fluffy cane sugar works beautifully here
- Unsalted butter: gives silky richness and tender crumb only use quality butter at room temperature
- Salt: sharpens flavors and keeps things balanced fine sea salt blends best
- Cocoa powder: adds a light chocolate finish Dutch process works best if you have it
- Baking soda: gives you that airy cake texture make sure yours is fresh for the best lift
- All-purpose flour: forms the cake’s soft base pick unbleached for a lovely crumb
Easy Steps for Success
- Finish and Frost:
- Once out of the pans let them chill completely on wire racks then slather on a thick layer of that tangy dreamy cream cheese frosting all over the top and sides
- Bake:
- Scoop the batter into both pans smoothing each one pop them in for about twenty five to thirty minutes rotating at halftime toothpick test the centers for doneness
- Make the Batter:
- Now add a scoop of dry mix and a splash of the colored liquid to your butter mixture keep alternating but always start and end with the flour don’t overdo the mixing
- Combine Wet Ingredients:
- Pour buttermilk, food coloring, vanilla, and vinegar into a cup and stir till mixed no streaks left behind
- Add Eggs:
- Mix in one egg at a time don’t rush it make sure each one is well blended so you end up with a smooth thick batter
- Cream Butter and Sugar:
- Beat together butter and sugar in a big bowl keep going for about four minutes until it’s fluffy scraping the sides if needed
- Mix Dry Ingredients:
- Whisk up flour baking soda cocoa and salt in a bowl give it a solid minute so everything is really light and blended
- Oven Ready:
- Fire up your oven to 350 F. Rub butter all over two nine-inch pans, dust with flour, and use parchment if you want stress-free cake removal later
 Bookmark
The best part is adding vinegar and bright food coloring—my kitchen looks magical as the batter turns ruby red. Grandma used to let me swirl the colors and it’s still my favorite bit of the process today.
How to Store Yours
Tastes even better the next day. Tightly wrap both layers or the whole cake and pop in the fridge for up to five days. To freeze for longer, use plastic wrap first, then a layer of foil any time you need to store up to three months.
Swap-outs You Can Use
No buttermilk? Mix a tablespoon of vinegar into a cup of milk and wait five minutes, it’ll do the trick. Dutch process cocoa is super smooth but regular cocoa works too. If you want to skip food dye, a spoonful of beet powder gets you a more natural color—just a softer hue.
Fun Ways to Serve
I love topping slices with berries like raspberries or strawberries—they add freshness and boost the tang. Big fan of frosting? Drop a dollop of whipped cream on top. Sometimes I press cake crumbs onto the sides or sprinkle cocoa over the top for vintage vibes.
 Bookmark
Southern History
This iconic cake comes from Southern US kitchens, standing for good times and family warmth. Folks have improved and swapped versions for holidays, birthdays, and weddings. Our recipe’s roots go back to my grandma from Louisiana—you couldn’t throw a birthday without it.
Frequently Asked Questions About Recipes
- → How does red velvet cake get so red?
It’s mainly from red food dye, but the buttermilk, cocoa, and vinegar mixture boost that bold color.
- → What’s the point of buttermilk in this cake?
Buttermilk keeps the cake extra soft and moist, plus gives a little tang in every bite.
- → Can you prep this cake in advance?
For sure! Bake and cool the cakes, freeze them, then add the frosting right before serving so it stays super fresh.
- → Any swap for cream cheese frosting?
You can go with whipped cream or the usual buttercream if you want to switch things up.
- → Got ideas for dressing up a red velvet cake?
Try some cake crumbs on top, fresh berries, or just toss on fun sprinkles to make it look special.
- → Is gel food coloring okay to use?
Yep, gel types actually punch up the color more than the regular liquid stuff.