
 Bookmark
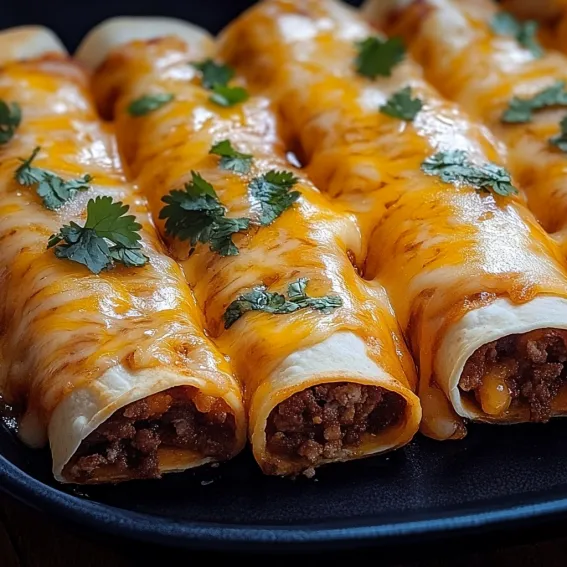
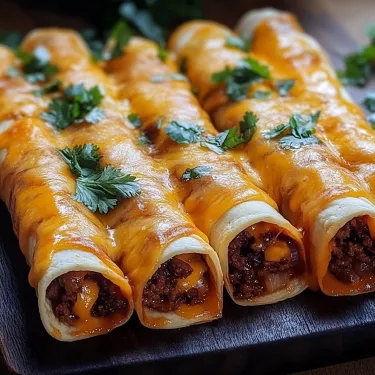
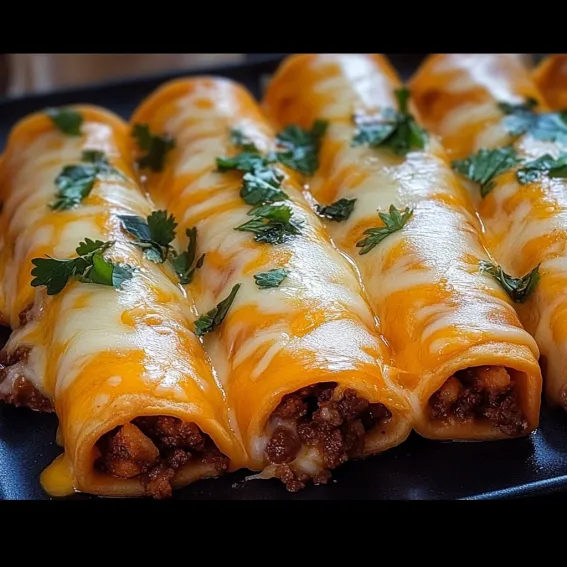
Cheesy Taco Sticks flip taco night on its head. Everything taco fans crave—savory meat, stretchy cheese—gets tucked inside buttery, baked pizza dough. These gooey hand-held snacks are quick to whip up and even easier to eat. Perfect when time's tight or you need something everyone wants to dip and share.
First time I made these, my crew couldn't get enough. Now they're a staple for movie night and folks literally race to grab the last one on the plate.
Craveable Ingredients
- Dried parsley: Toss on some fresh-looking dried parsley for a little color and pop of taste
- Colby Jack and cheddar cheese sticks: Grab cheese sticks, not blocks—it’s less mess and you get the right cheesy pull
- Pillsbury pizza dough: Store-bought dough saves effort and comes out golden every time
- Ground beef: Pick fresh, top-quality beef so the filling is juicy and tasty
- Butter: You'll need melted butter to brush on top—that’s what turns them irresistible and golden
- Garlic powder: Use garlic powder for a knockout smell with every bite—fresh is best if you can
- Taco seasoning: Go with a low-sodium mix if you want to control the salt—this blend makes the beef shine
Simple Steps
- Serve
- Let them cool for a couple minutes after baking so the cheese isn’t blazing hot and comes out just the right kind of melty
- Bake
- Pop the tray into your hot oven twelve to fifteen minutes. Keep an eye out—by twelve minutes, they’re probably golden and the cheese should be bubbling
- Brush with Garlic Butter
- Mix melted butter, garlic powder, and parsley in a bowl, then use a brush to cover each uncooked stick. This makes them shiny and mouthwatering
- Place on Baking Sheet
- Put your rolled sticks with the seam side down on the parchment. This keeps the filling safe and tucked inside while they cook
- Roll and Seal
- Lift one side of the dough and wrap it over the filling. Squeeze all the seams together—pinch the ends too so the cheese can’t escape in the oven
- Assemble the Taco Sticks
- Drop a couple spoonfuls of beef onto each little dough piece, then sit half a cheese stick on top. Don’t pile it too high—otherwise the cheese spills out when you roll up
- Prepare the Dough
- Roll out your pizza dough to even it out, then use a pizza cutter or knife to cut ten strips. A dust of flour on the table helps everything slide easy
- Add Taco Seasoning
- Pour the seasoning over the cooked beef and add whatever water’s needed—just like the packet says. Mix really well and let it simmer to soak up the flavor
- Cook the Beef
- Brown your beef in a skillet and break it up as it cooks. Once it’s cooked through and a little crispy, drain the fat so the filling isn’t greasy
- Preheat the Oven
- Flip the oven to 400°F (200°C) and line your tray with parchment—so nothing sticks and cleanup’s easy
 Bookmark
If you ask me, Colby Jack is the MVP here. This cheese always melts like a dream, never greasy. My daughter still talks about the cheesy stretch when she first pulled one apart—honestly, that moment is worth making them again and again.
Storing Leftovers
Keep leftovers sealed in a container in your fridge up to three days, or wrap up and freeze if you need them to last longer. When you're ready, just heat in a toaster or oven until they're hot and crisp—they won't get soggy this way.
Swap In What You Have
No beef? Swap for ground turkey or chicken to lighten things up. Need it meatless? Use black beans, corn, and the taco seasoning. Cheese is a personal thing—try pepper jack, Monterey Jack, or mozzarella if that's your vibe.
How to Serve
Put these out with whatever sides you love—sour cream, salsa, guac, maybe even a fresh salad. Great for parties, too. You could make it a full dinner with Spanish rice and beans. Hand out small bowls for dipping—everybody gets their favorite way to enjoy them.
 Bookmark
Quick Backstory
These taco sticks aren't straight from Mexico. They're inspired by American-style tacos and the idea that snacks should be fun to eat with your hands. It's all about bringing tasty flavors together in a grab-and-go style that modern families love.
Frequently Asked Questions About Recipes
- → Which cheese melts best in taco sticks?
Mozzarella or colby jack cheese sticks give you that gooey pull and creamy flavor. If you want extra zing, use pepper jack or swap in cheddar—just pick what you enjoy most.
- → Can I prep taco sticks early?
Absolutely! Put them together and pop in the fridge until bake time. Bake right before eating for the crispiest texture.
- → Is there a swap for pizza dough?
Go with classic crescent rolls or even your favorite bread dough if you want a change from pizza dough—they both work great here.
- → What's the best way to keep fillings inside?
Seal those edges tight and don't load the dough too full so everything stays put when baking.
- → What sauces go well for dipping?
Dip them in sour cream, spicy ranch, guacamole, or even salsa. Try your favorites—there’s no wrong answer!
- → How do I store extras?
Stick your leftovers in a sealed container in the fridge for up to three days, then warm them up when you're ready to snack again.