
 Bookmark
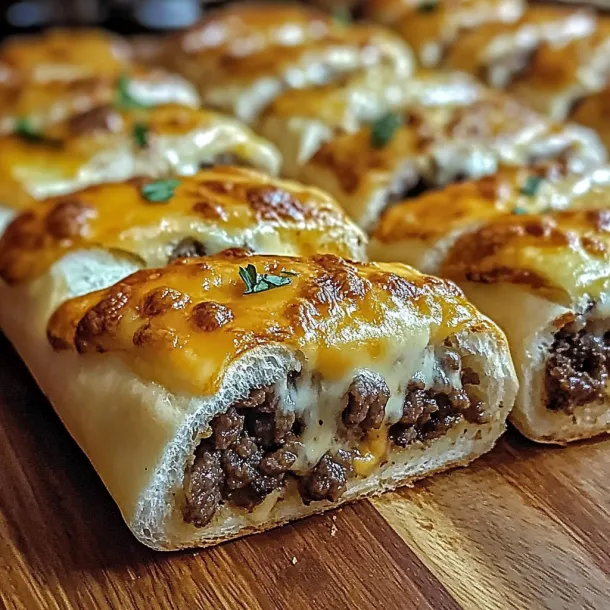
This hand-friendly spin on Philly's renowned sandwich packs all the tastes of a standard cheesesteak into a grab-and-go, easy-to-share format that's great for sports viewing, laid-back meetups, or an entertaining family meal. The mix of soft steak, sweetened onions, and peppers tucked inside cheesy dough makes for a mouthwatering treat that quickly vanishes at any get-together.
I came up with these packed breadsticks while having friends over for a final basketball match. Regular sandwiches seemed too drippy for my couch setup, but these handheld bites solved the problem perfectly. They've now become what everyone asks for whenever we watch games together.
Ingredients
- 1 lb pizza dough: Grab it from the store to save time or make your own if you want extra taste
- ½ lb thinly sliced ribeye or sirloin steak: The classic cut that gives you the tastiest results and best chew
- ½ cup sliced onions: Gets nice and sweet while cooking, building that real cheesesteak base
- ½ cup sliced green bell peppers: Gives a nice crisp element to balance out the rich stuffing
- 1 cup shredded mozzarella cheese: Creates that amazing stringy pull when you take a bite
- ½ cup shredded provolone cheese: Adds that authentic Philly cheesesteak flavor kick
- 1 tablespoon olive oil: Better oil really changes how well your veggies brown up
- ½ teaspoon salt: Brings out all the good flavors without going overboard
- ½ teaspoon black pepper: Just grind it fresh for the tastiest results
- 2 tablespoons melted butter: Makes the outside turn beautifully golden
- 1 teaspoon garlic powder: Gives the outer crust a fantastic smell and flavor
Step-by-Step Instructions
- Prepare the Filling:
- Sauté peppers and onions in olive oil on medium heat for 4-5 minutes until they start to brown at the edges. They should get softer but keep some crunch. Toss in your thinly cut steak with salt and pepper, cooking just until it's not pink anymore but stays juicy, around 4 minutes. Don't cook it too long since it'll keep cooking in the oven. Let the mix cool a bit so it won't melt your cheese too early.
- Prepare the Dough:
- Heat your oven to 425°F and put parchment on a baking sheet. Roll out your pizza dough on a slightly floured counter into a rectangle about ¼inch thick. Work gently to keep the thickness even everywhere so it bakes right. Aim for a rectangle roughly 10 by 14 inches so your filling fits just right.
- Assemble the Breadsticks:
- Spread your cooled steak mix down the middle third of your dough, leaving an inch of space at top and bottom. Make sure you spread it out evenly so every bite has the right mix of stuff. Scatter both cheeses over the meat, making a thick layer that'll melt into all the little spaces in the steak mix.
- Create the Breadstick Shape:
- Cut 1inch strips at angles along the sides of the dough from the edge to about ½ inch from your filling. Fold the top and bottom edges over the filling, then cross the strips over the top, swapping from side to side to make a braided look. This keeps everything inside and makes it look like classic breadsticks.
- Add Finishing Touches:
- Mix your melted butter with garlic powder and brush it all over the dough surface. This step adds great flavor and helps get that nice brown crust that makes breadsticks so tempting. Throw a tiny bit of extra salt on top if you want even more flavor.
- Bake to Perfection:
- Put it in your hot oven for 18-20 minutes until your breadsticks turn a deep golden color and the cheese inside melts completely. The dough should sound empty when you tap it, telling you it's fully baked. Let it sit for 5 minutes before cutting so the filling doesn't spill out everywhere.
 Bookmark
We always argue at home about whether these beat traditional cheesesteaks, but I think dipping them in marinara or garlic mayo gives these breadsticks a real advantage. I still laugh about how fast they disappeared at my boy's graduation party - gone before anything else on the table.
Make Ahead Options
These breadsticks are great for prepping early. You can cook the filling up to two days ahead and keep it in the fridge in a sealed container. You can put together the whole thing and keep it in the fridge for up to 8 hours before baking - just cook them a bit longer if they're cold, about 2-3 extra minutes. If you want to save them longer, freeze the assembled breadsticks on a tray then move them to a freezer bag once they're hard. When cooking from frozen, add 5-7 more minutes to your baking time.
Perfect Pairings
These breadsticks work great as a main dish with just a basic green salad, but they're awesome appetizers too. Try serving them with different dips like marinara, roasted garlic mayo, hot cheese sauce, or spicy mayo. For a full Philly-themed spread, make an Italian hoagie salad on the side with salami, provolone and Italian herbs mixed in oil and vinegar dressing.
Troubleshooting Tips
If your breadsticks get too brown on top but stay doughy inside, turn the oven down to 375°F and bake them 5-7 minutes longer. If your filling seems too wet after cooking, dry it with paper towels before adding it to the dough so your breadsticks don't get soggy. To make sure your breadsticks stay closed while baking, wet the edges of the dough strips with a little water before folding them over the filling so they stick better when they bake.
 Bookmark
Frequently Asked Questions About Recipes
- → Can I make these ahead of time?
Sure thing, you can fix the filling and roll up the breadsticks a day before. Just keep them wrapped in the fridge and pop them in the oven right before you want to eat. They might need an extra 2-3 minutes in the oven when coming from the cold.
- → What's the best dipping sauce to serve with these breadsticks?
Marinara pairs great, but you can't go wrong with ranch, garlic mayo, or melted cheese for dunking. If you want that true Philly feel, go with a side cup of warm cheese sauce.
- → Can I use other types of meat instead of steak?
You bet! While ribeye or sirloin gives you that real Philly taste, you can swap in chicken, hamburger meat, or even big mushroom caps if you don't eat meat. For a quick fix, some sliced deli roast beef works in a pinch too.
- → How do I prevent the breadsticks from getting soggy?
Let your filling cool a bit first. Don't stuff too much inside each piece of dough. Make sure your oven hits 425°F before you put them in to cook the outside fast. And drain any extra juice from your meat and veggie mix.
- → How should I store and reheat leftovers?
Put cooled extras in a sealed container in your fridge for up to 3 days. Warm them back up in a 350°F oven for about 5-7 minutes. An air fryer set to 325°F for 3-4 minutes makes them extra crispy again. Try not to use the microwave as it'll probably make them soft and wet.
- → Can I freeze these breadsticks?
You can freeze them raw or after baking. For unbaked ones, set them on a tray until they're hard, then move them to a freezer bag. Cook them frozen but add 5-7 more minutes. For already baked ones, cool them down, wrap each one, and they'll keep frozen for up to 2 months. Heat them in a 350°F oven until they're warm all through.